Build a Mechanical Solar System (Orrery): Easy DIY Steps

How to make a mechanical solar system?
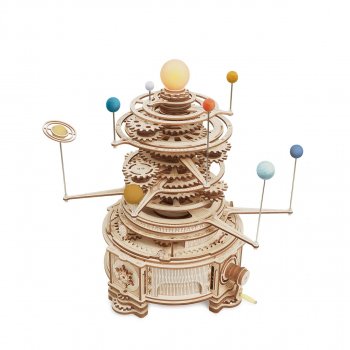
A mechanical solar system (often called an orrery) is a rotating model that uses gears to move planets around the Sun. The easiest way to build one at home is to start with a pre-cut wooden kit, then fine-tune the movement so the planets rotate smoothly and stay aligned. A scratch build is possible, but it requires careful gear math, precision cutting, and a sturdy frame.
1) Choose your build approach
Kit build: Best for most makers—parts are pre-cut, gearing is pre-planned, and assembly is straightforward with basic tools.
DIY from scratch: Requires designing gear ratios, sourcing shafts/bearings, and fabricating a stable base and arms.
2) Gather tools and materials
For a wooden kit or simple DIY: wood glue, a hobby knife or sandpaper, small clamps (optional), and a screwdriver. For a scratch build: additional items like a drill, dowels/metal rods for axles, washers or small bearings, and a hand-crank or small motor.
3) Build the base and gear train first
Assemble the base so it sits flat and doesn’t wobble. Dry-fit the gear train before gluing, then sand any tight edges where gears meet. A tiny amount of wax (like a candle rubbed lightly on gear teeth) can reduce friction and improve the feel of the rotation.
4) Install the arms and planet holders
Attach planet arms in the correct order and keep them level as you tighten fasteners or set glue. If the model binds, check for arms rubbing the frame, shafts that aren’t perfectly vertical, or gears that are slightly mis-seated.
5) Test rotation and calibrate
Turn the crank slowly and watch for skipping, grinding, or uneven speed. Adjust alignment, re-sand tight joints, and confirm each planet’s arm clears the others. For a deeper, step-by-step walk-through and build tips, follow the full guide here: rotatable mechanical solar system DIY wooden kit orrery guide.
FAQ
What materials do I need to build an orrery?
A wooden kit typically needs glue and light sanding tools, while a scratch build may require rods for axles, bearings or washers, a drill, and precisely cut gears or gear components.














Leave a comment